Enough with the chatter here goes!
MATERIALS YOU NEED:
- Dolman dress bodice and skirt
- 3/8" wide elastic
- Sewing machine
- Serger (not essential)
- Matching threads
- Pins
- Measuring tape
- Scissors
-Safety pin
-Safety pin
1. Lay out your bodice and skirt waist seam to waist seam and make sure they are roughly the same length, within 1 or 2cm. Turn the bodice so the right side is facing out and turn the skirt so the wrong side is facing out. Then grab a few pins and mark the center of each of the waist seams using said pins. Not an essential step but it makes it easier when matching together the seams.

2. Put the skirt inside the bodice so that the waist seams are together. You should have right side to right side, double check and then pin at the seam.

3.Sewing machine time! Set your machine to a stretch stitch or a plain zig zag if you don't have a stretch setting. As my fabric was very stretchy I lengthened the stitch length a little to make it easier to sew and used a ball point needle. Here are my settings on my Brother sewing machine:

4. Use a 6/8" seam allowance and as you sew make sure you do not stretch or pull the fabric as this will create a wavy seam which is never pretty. If you have the option use a lower tension on the presser foot to allow the fabric to go through the machine a lot easier or use a walking foot.


4. Use a 6/8" seam allowance and as you sew make sure you do not stretch or pull the fabric as this will create a wavy seam which is never pretty. If you have the option use a lower tension on the presser foot to allow the fabric to go through the machine a lot easier or use a walking foot.

Finished seam:


If your using a standard sewing machine set it to a long zig zag stitch.
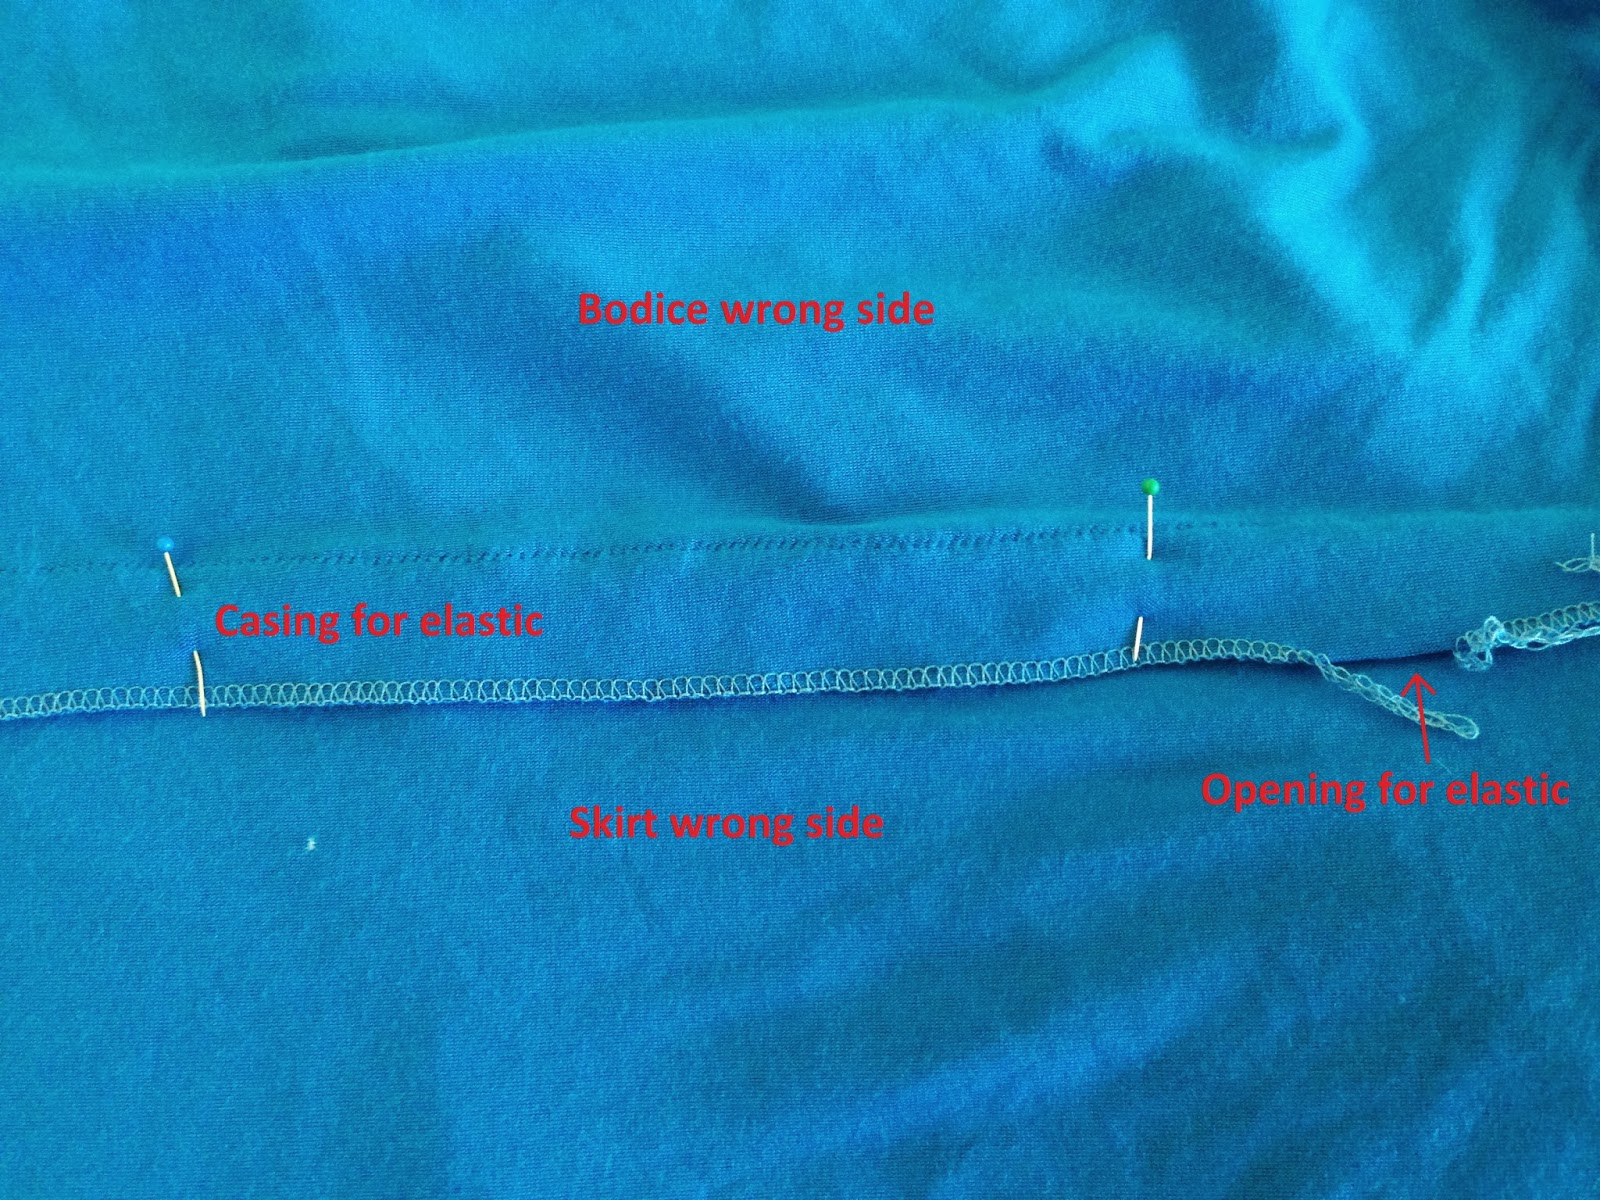
6. Serge or sew along the edge of the seam allowance sewing both edges together to make the casing for the elastic. Leave about an inch gap when you get the end so you have enough space to slide in the elastic.

Finished seam with gap for elastic:

7. Fold the casing down towards the skirt and pin flat. You can iron it at this point to make it a little easier but make sure you use the right heat for your fabric. Ruined many a garment by not thinking about the iron heat!
8. Back to the sewing machine with the same stretch stitch as in step 3. Sew close to the sergered stitches or zig zags to make a channel for the elastic to go through. Leave a few inches at the same place as the opening for the elastic so you have enough give to be able to finish off the serging when the elastic is in place.

9. Measure out your elastic, it should be 1 inch less than your waist measurement plus 6/8" for seam allowance. Pin one end next to the opening of the gap in casing and put a small safety pin through the other end of the elastic.

10. Push the end of the elastic with the safety pin attached into the casing. Then slowly and carefully push the safety pin through by pushing and pulling fabric over the safety pin. I hope that makes sense! Make sure the pin doesn't come undone from the other end of the elastic. Do this until your through to the other side.

11. Once you have the elastic through pin both ends together so they overlap by 3/8".

12. Join the elastic ends together using a zig zag stitch on the sewing machine. I like to sew horizontally first then vertically to close up both ends of the elastic to make it smooth in the casing. To sew the elastic pull it out as much as possible to make it easier.

Settings on my sewing machine.

Pattern on the elastic. Not extremely neat but it does the job and it will be inside the casing so no one will know.

13. Now you should have the elastic completely hidden inside the casing with gaps in the sewed edges. This is mine from the right side:

Serge the casing to finish off that seam and then sew down the remainder of the casing to the skirt.
14. Last thing to do is neaten out the gathered in the wasitline and you should have something that looks like this:
 |
| Wrong side |
 |
| Right side |

In my next tutorial I will be showing you how to finish off the sleeves and the hem.
Comment and question away!


