Wednesday, November 12, 2014

Satin Bridesmaids Dress

I have been working pretty relentlessly on creating a new line of bridesmaids dresses that I am now uploading to my shop. The first one I will show you is this satin number which features a built in waistband for the ultimate slim look. The dress is made from a luscious Duchess satin and is lined with an incredibly soft and non-static rayon lining.

This is the perfect bridesmaids dress as it is available in lots of colors and can be customized to your specific style. For example, change the skirt to a pleated or a circle skirt and alter the length or add some sleeves. The choices are endless!

Check out the design on my new shop by clicking here.

Without further delay here are the photos of the dress:


Can't wait to hear what you think and let me know how you customize this dress for your wedding.

Monday, October 27, 2014

Decision Time on Gold Sequin Fabric!

I have quite a bit of gold sequin fabric left over from a previous design and are a little stumped as to what to do with it. I have lots of ideas but can't make a decision and would love your input!

Here is a photo of the fabric in question:


Create your free online surveys with SurveyMonkey , the world's leading questionnaire tool.

Thursday, October 23, 2014

Gold Sequins and Peter Pan Collars!

I have just finished working on a custom Peter Pan Collar dress for a client which will be worn as her wedding dress. I loved how it turned out and thought I would share the results with you here. Let me know what you think!


For the original listing of this design I used long sleeves and black trim. I love how my clients create their own unique looks from my designs. Its great to know I've made a one of a kind piece.


For the original listing on my Etsy shop please click here!

Friday, October 17, 2014

Pocket Perfect! - Tutorial on Inseam Pockets for Trousers or Shorts

For my next trick I will perform a beautifully sewn pocket for a pair of shorts! I recently went through the task of making three pairs of shorts for a client and thought I would share with you my method of creating the inseam pocket. I'm assuming that you already have a pattern for the pocket and I'm just taking you through the sewing steps. If you would like a tutorial on how to make a pattern for this type of pocket just shout and one may be provided!

MATERIALS NEEDED:

- Fabric and shorts/trouser pattern
- Lining
- Scissors
- Sewing machine
- Pins

TUTORIAL

1. Grab all your pattern pieces for the shorts as we are about to begin! So you should have a pocket lining (lining fabric), a pocket backing (lining fabric) and a facing (fashion fabric), like so:


2. To make the pocket nice and neat and professional finished which is what we all want we need to finish the edge of the facing. You only need to do the edge of the facing that will be inside the pocket so don't bother with the side seam edge or top or bottom. I use a serger to finish the edge but you can use a zigzag stitch on a normal sewing machine.


3. Pin the beautifully neat facing to the pocket lining along the side seam edge of the pocket lining and sew in place with a normal straight stitch.


4. Next on the agenda is attaching the pocket backing to the front of your garment of choice. Pin the two straight edges right sides together and sew with a plain old regular straight stitch.


5. To make a lovely crisp edge for the pocket understitching is the thing to do. So first you'll need to finish the raw edge with either a serger or zigzag stitch. Then iron the seam flat so you have a nice edge to work with then to the sewing machine once more.


From the wrong side of the fabric sew the finished raw edge to the backing lining. This can be quite tricky so go slowly.


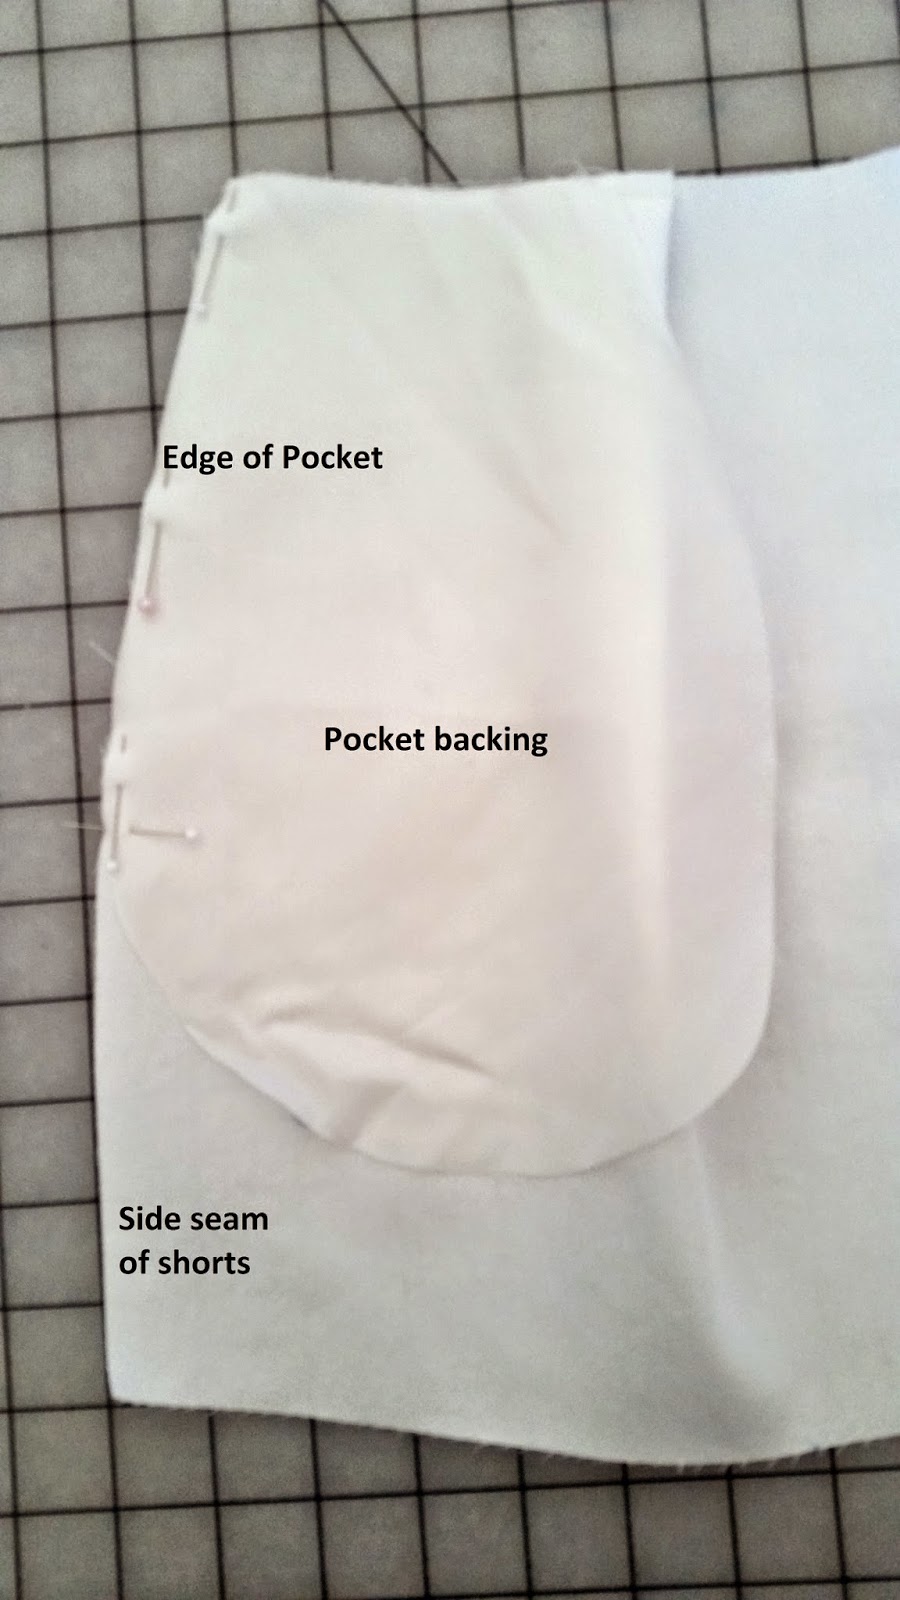
6. Now the pocket backing will meet its friend for life the pocket lining with attached facing! Mark on the pocket lining where the edge of the pocket will go to, I do this with a pin but you can use chalk or anything that marks.


Match up the pocket backing and lining and pin around the edge. Don't worry if its not an exact match as you can trim around the edges later. Make sure that the pocket backing is lying flat and is in the correct position on the lining.


7. Sew the pocket lining and pocket back together around the edge using a long basting stitch. Once sew together double check to make sure everything is lined up properly by folding the pocket over to to the wrong side of the short front. You should have a small triangle of the facing showing.


8. Easy step of just serging or finishing the edge of the pocket pouch so its all neatly finished on the inside of the garment. I use my serger again but a zig zag stitch would also do the job.


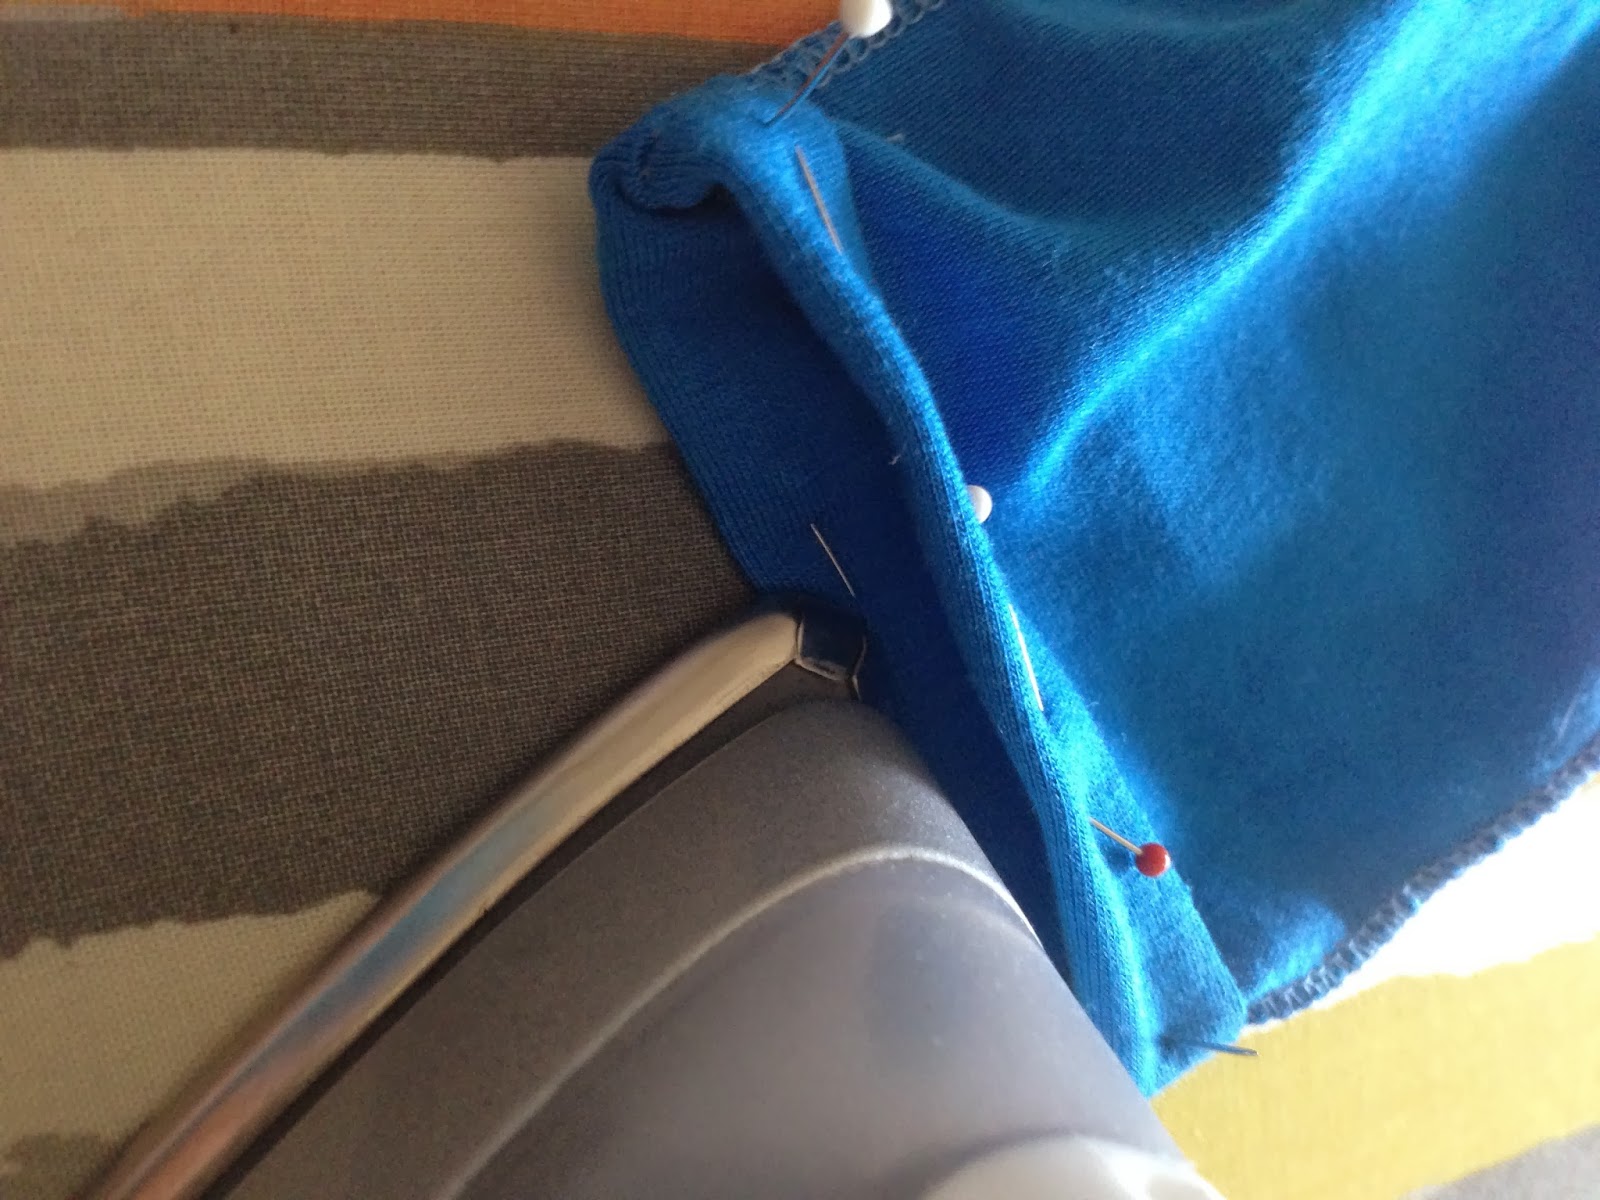
9. Turn the pocket to its correct position so its on the wrong side of the shorts and pin the top of the pocket lining to the the top of the front short ie where the waistband will go. Also pin the side seam of the pocket to the side seam of the shorts. Make sure at this point that the pocket is laying flat.

View from right side
View from wring side

Baste that down then you are ready to construct the rest of your garment with a perfectly sewn pocket!

I hope this all made sesne, if not I am happy to answer any questions so fire away!!

Wednesday, September 24, 2014

Tutorial: How to Make a Halloween Bat Headband

It's that time of year again fall is just around the corner and along with it the spookiest holiday of the year - Halloween! Even on Halloween every girl (or boy) still needs to accessorize and this bat headband is the perfect way to do that. Here is a quick tutorial on how I make the headband.

MATERIALS NEEDED:

- Foam board in black
- Wiggle eyes
- Headband
- Scissors or Stanely knife
- Black pom pom
- Glue gun

TUTORIAL

1. To start with you'll need to draw out bat wings with a base. You can make the wings as big or small as you like it really depends on how scary you want to be! Once you have bat wings drawn out cut it out and use it as a template on the foam. Cut the wings out on the foam and hey presto your little bat is born! The basic shape I use is below:


2. Fire up the glue gun and lets give this bat some body - literally! The glue I use is in the following picture:


Get the pom pom and the wiggle eyes and glue those suckers on. Here are my befire and after cosmetic surgery pictures.....

BEFORE


AFTER - and finally the bat sees!


3. Body meets wings time. Slap some glue on the wings in the middle and shove the bat head on the wings to create your beast. Make sure the eyes are for one facing forward and are looking straight ahead ideally. 


4. Now we have our bat ready you need to make some complicated method of affixing this creature to your headband. I do this in the form of foam! Cut out two circles in foam that are three times the diameter of your headband width like so....

Add caption

5. Glue one of the circles to the bottom of you bat attaching the wings and the pom pom body. Try to get it in the center as much as possible.


6. Here comes the magic part. Put a little bit of glue on the bottom of the circle you just attached on the front and back edge leaving the center strip of the circle glue free. You are aiming to make a channel so you can slide the bat on and off your headband. This way you can still use your headband after Halloween without an unsightly bat which people might find odd or special after the holiday! The channel should look a little something like this:


7. All that left to do is to slide the completed bat onto your headband and hot the streets (not in that way!). 


Hope you enjoyed this tutorial as always all comments and questions are welcome. 

Monday, September 22, 2014

Tutorial: Finished Dolman Dress Finally!!

Finally got around to taking photos of the dolman dress featured in the tutorials. So here's how the final dress looks. Its super comfortable to wear with the elasticated waist, I think its going to be one of my favorite items over winter with boots and leggings.

Here are the links for the tutorial so you can make your own:


Tutorial 5: Let's Finish This Thing - Hem and Sleeve Finished for Dolman Dress

Let me know what you think:


Comments and questions are always appreciated so fire away!!

Thursday, March 13, 2014

Tutorial 5: Let's Finish This Thing - Hem and Sleeve Finishes for Dolman Dress

Now to finish it all off with two (three if you count both sleeves!) final pesky raw edges to make beautiful. Then we will have a brand spanking new dolman dress to strut around in. Perfect to throw on for a lazy day but look stylish at the same time how much more do you want!! For previous tutorials check out the links below:


Right lets get on with it!

MATERIALS YOU WILL NEED:

- Nearly finished dolman dress whoop whoop
- Coverstitch machine or normal sewing machine will do the trick
- Iron
- Pins
- Measuring tape
- Matching threads for your machine of choice
- Scissors

1. Start by roughly folding over the seam allowance on each sleeve we'll perfect it later but this makes it easier to do. Make sure you are folding the raw edge to the wrong side.


 2. Grab your tape measure and pins and work around the sleeve getting your seam allowance even. I use a 0.5" seam allowance and will be using my coverstitch machine to finish the edges. You can use whatever seam allowance you feel comfortable with. 


3. This step isn't 100% necessary but I like to do it so I get the perfect finish and my seam allowance is completely even. Also if a pin comes out while your sewing you know where your seam allowance should be. Iron on the fold with a semi hot iron to make the fold nice and crisp. 


4. I use a coverstitch machine to finish my raw edges and here are my setting on the Brother machine.


If you don't have a coverstitch machine you can use a regular sewing machine with a twin needle attached to get the same finish. Some tips for a twin needle: use a stretch needle, lengthen your stitch and loosen your stitch tension if you get tunneling. 

My finished sleeved looks like this:


5. On to the hem. It is exactly the same steps as the sleeves but it is a little less fiddly. Roughly fold the hem over to the wrong side and then go around with your tape measure and even it out. Pin as you go. 


6. Iron the edge just like you did with the sleeves and then your ready to hit the sewing machine. 


7. Sew using your coverstitch or regular sewing machine and you should end up with a little something like this: 


And that's a rap! Dress complete time for photos to show you lovely people the finished product. 

Stay tuned for the completed dress photos and feel free to ask questions or comment. 
Related Posts Plugin for WordPress, Blogger...