I decided to add three strips of boning to each side to give extra support for the bust. I used plastic encased boning. I removed all the plastic and sewed each strip of boning to the bodice by sewing a straight stitch either side of the channel for the plastic.
TIP: To smooth the tips of the plastic melt both ends with a lighter or match to remove any rough bits.

Then I just put the plastic back through the channels of the casing and sewed both ends down to stop any boning sliding out. Here is the finished bodice with boning.
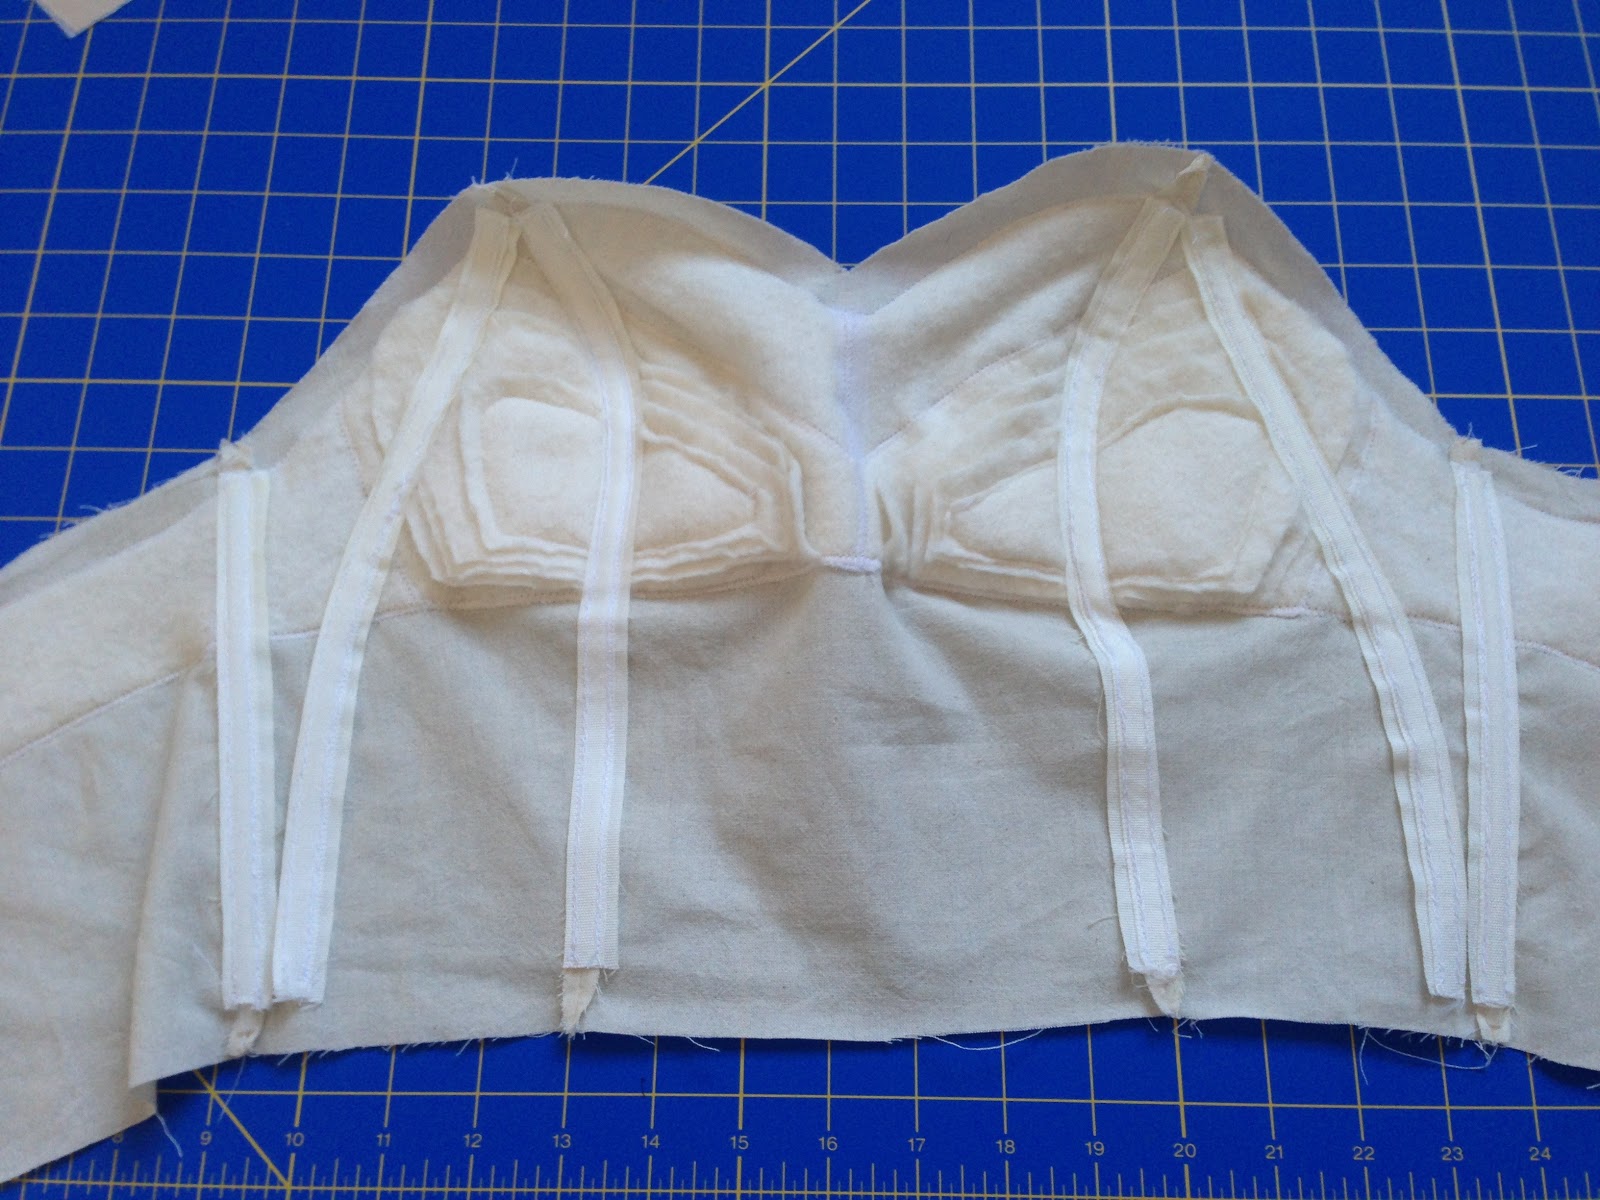
I have noticed with a lot of strapless design that they leave you very flat chested because of the tight fitted structure, so to try and combat this I added a piece of elastic as sort of under wire to the bottom of the bust area. My hope was that this would pull in this area giving a more shapely look - worth a try. I pulled the elastic so it had a bit of a stretch between each piece of boning but not too much for it to ruffle the muslin. I sewed it to the boning and will attach it later to the zip along the center back seam.
 |
| Close up of the elastic 'underwire' sewed to the boning just below the padded bra |

Now all that was left to do was cut out the linings and satin bodice and sew it all together! Simple right! I forgot to take any pictures until right at the end so sorry about that. Hope you get the general idea though of how it fits together.
I used two different linings one in china silk and the other a cotton blend. The china silk was for inbetween the satin and the underconstruction so nothing showed through and the cotton lining was to make a nice finish on the inside of the bodice. Sorry about the photo I was doing this at night so the light was rubbish.
 |
| From top layer to botton: Satin - china silk - underconstruction - cotton blend lining |
I like to do things in stages so I sewed each the satin to its lining and then the underconstruction to its lining.
 |
| Underconstruction to lining |

The final thing to do was to sew twill tape to the seam pulling it a little tighter than the length of the actual seam. This makes sure that the top of the bodice stays hugged in as much as possible. I trimmed all the seam allowances and understitched as far as possible to make sure the lining stayed in place.

Here is the finished bodice on the dress form.

And drum roll please........
the final dress is finished with the skirt sewed on. Phew that was a lot of work! I hope you all like it!

And thats it another item for my Etsy shop ready to go. I will be taking photos of the dress this week to put on my shop so stay tuned for that. Any thoughts or comments are very welcome.


