Showing posts with label Design. Show all posts

Thursday, January 2, 2014

Tutorial 2: Cutting Some Shapes and Sewing Them Together for the Dolman Dress

Onto the most fun part of making a dress - the actual sewing! Here is a quick guide on how to start to put together the dolman dress for the pattern in my first tutorial, which you can find here: 


MATERIALS NEEDED:

- Pattern
- Jersey knit fabric: 2 yards
- Sewing machine or serger
- Matching thread for fabric
- Scissors
- Rotary cutter and mat (not necessary but makes it easier!)

Ready steady sew!!!!

1. Fold your fabric in half making sure it is down the grain line and then lay and pin the top pattern on the fold of the fabric. Cut it out using scissors or a rotary cutter if you have one. 

Cutting out my top after taking the pattern off. 

Completed top - front
2. Now we need to do the same for the back of the top. If you want to make the neckline higher in the back, which I normally do, you can just add some extra fabric to the neckline when you cut it out by using a shallower curve.

Comparison of my front and back necklines

3. That's the front and back top done, now for the skirt. Fold the fabric again down the grainline and place the skirt pattern on the fold of the fabric and cut out the skirt. Repeat this again so you have both the front and back of the skirt pieces.

One skirt piece cut out on the fold
Now you should have two top and two skirt pieces cut out.

4. Here comes the fun part. Pin the two top pieces right sides together and sew along the side seams and the shoulder seams to create the bodice of the dress. You can do this using either a serger or a regular sewing machine with a stretch or zig zag stitch. 

5. Sew the two front and back skirt pieces together making sure you sew right side to right side. 

Dress top and skirt sewn together


The dress is finally taking shape. The next steps are to finish the neckline, sew in the elastic and waist seam of the dress and finally the hem and sleeve finishes.

In my next post I will go through how to sew in a bias strip into the neckline to get a nice clean finish. Comments and questions welcome :-) 


Monday, November 5, 2012

The Case of the Pointy Bust!

I've been working away on the strapless bodice and have finally got the under-construction pretty much complete. I need my husband to come home from work (later as per) to help me fit then all should be done. So here is a quick demo/tutorial on how I went about making the bodice.

Following on from my last post here is the put together bodice made from muslin.


Surprisingly the fit actually was pretty good apart from the massive pointy bust area of course! Pretty good going for my first attempt. How to fix the problem...

1. I pinned the excess fabric along the princess seam so it gave a much better fit.


 2. Remove the bodice from the dress form and then mark with chalk along the line of the pins so when you take them out you can see how much material you want to lose.


3. Unpick the seam and cut away the excess fabric remembering to leave a seam allowance mine was 3/8".

Unpicked sides with chalk marks.
Cut away excess leaving 3/8" seam allowance

4. If your not planning on using your pattern again them you can skip this step. If you are then it is important to make the same the same adjustment you made on the muslin to the pattern so you won't have the same pointy bust problem the next time!

I cut away the same size piece as I did on the muslin
5. The fun part! Sew the bodice back together to see if it worked out! The adjustments I made worked out great. I was too lazy to iron the seams which would have made them smoother. Slap wrists for me!


One finished and fitted bodice! Starts to get a little more tricky from here and in the next few posts I will be going into details about how I make the structured bodice including boning, making padded cups and other such fun things!

I hope you find this tutorial helpful and as always all comments and questions are very welcome.

Happy sewing!

Wednesday, August 15, 2012

Cut Out Paris Dress Taking Shape

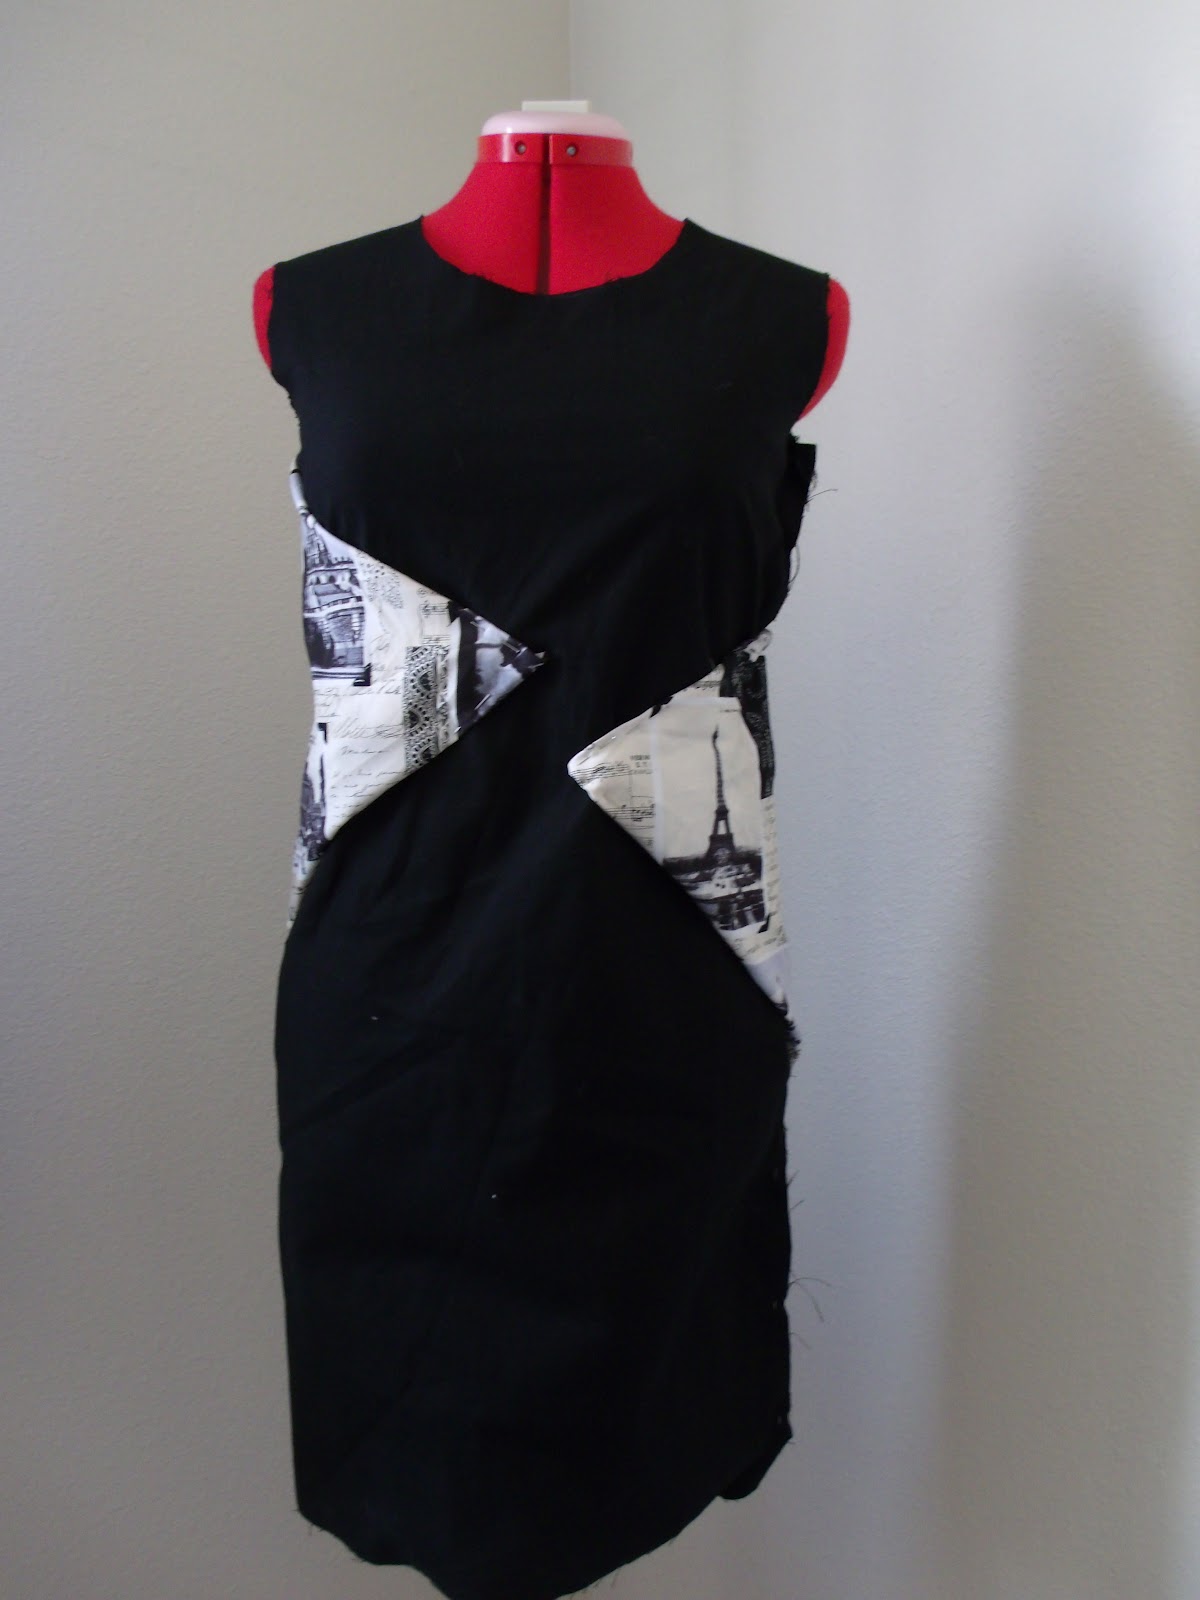
So after much deliberation and thanks to all your comments I finally decided on a design to go forward with! Woohoo! The design I have chosen is ..... drum roll please .......... design number 2!! I liked this one because it will be very flattering as the pattern focuses on the waist giving a nice shape and also hiding any lumps and bumps that all us ladies have!

In this post I will go through the next stages of the design process - finalizing the design and making the pattern. Here goes.

STEP 1: First I fiddled around with the two triangles to try and get the right shape and size. I marked the center if the waist on my shift dress so I knew where the point of the triangles had to hit.


This was my final design. At this point I used some colored chalk and marked around the triangles on the black shift dress so  could get a rough idea of where I wanted them.

STEP 2: I removed the dress from the dress form and unpinned the Paris material. Then I unpicked the side I previously basted closed to get something looking like this...


STEP 3: So I had a rough idea of where I wanted the cut out sections to be I just needed to tidy it up a bit. To do this I first measured on the side seam the top of the triangle from the arm holes on both sides and drew a horizontal line between these points. I did the same with the bottom of the triangle making sure both sides where equal and that the two lines were parallel. Then I marked the middle point of each line and drew and straight line through the points.


STEP 4: Now I have a central point to work around. I wanted the tips of the two triangles to be 1" apart at the center. I drew a line parallel to the horizontal line at the level of the center point and marked off 0.5" either side of the vertical line. Then I just connected the dots! Drawing a line from the top of the side seam mark to the tip of the triangle and then the bottom mark to the tip of the triangle.


STEP 5: At this point I needed to add some seam allowances before I cut out the pieces. I usually use 3/8" but you can use whatever you want. I marked 3'8" inside each triangle for my cutting line.


STEP 6: Rinse and repeat for the back! And your ready to cut.


Now for the pattern.

STEP 7: Basically you just need to follow the steps you used to get the cut out triangles on the material. Making the two horizontal lines and marking the center point. You can use the cut out sections to check you have done the pattern right. Remember they will be your seam allowance smaller on every side so don't panic that you have done it wrong!


And that's it!

Hope you found the tutorial useful. You can use this technique for any shape you want so get creative! Would love to hear your thought and comments are always welcome! 


Monday, July 9, 2012

Cut Out Shift Dress Ideas - Please Help Me Decide!!

As I said in my previous post I am very indecisive which I know isn't great for a designer! I should be able to make decisions right?! Well with this shift dress I have a major choice to make - Which design do I like best and want to develop? This is where I need your help.....

I have been furiously pinning the Paris fabric to the shift dress on my dress form in various shapes and sizes to see where I want the cut out sections to be. But turns out this has just made me even more confused! Here are the options....


DESIGN 1: This one is based off the t-shirt I made earlier with two diamond shapes which show round the front and the back. I could alter the position of the diamonds and the size.


DESIGN 2: This one is just a progression of design 1 with the diamonds meeting at the waistline symmetrically.


DESIGN 3: Single asymmetrical band across the waistline in two different widths.


DESIGN 4: Random patches of the material. Might end up changing the shape of them to rectangles of different sizes if I go with this one.


DESIGN 5: With this one I think I would make the section below the waist slightly narrower as it looks unbalanced as it i, but this is the general idea...


DESIGN 6: This is a follow on from the previous design. The top bit will hit the shoulder seam but I ran out of material so you'll have to use your imagination!


DESIGN 7: Asymmetric look again.


DESIGN 8: For this one I broke up the previous design into two different curves. I was getting tired by this point so its quite messy - sorry about that!


DESIGN 9: Final one! For this one I basically did the opposite to design 6.


Phew! That was a lot of designs! I would love any feedback or comments you have to help me decide on which on to go with. Which one is your favorite? 
Related Posts Plugin for WordPress, Blogger...