Showing posts with label dress form. Show all posts

Wednesday, August 15, 2012

Cut Out Paris Dress Taking Shape

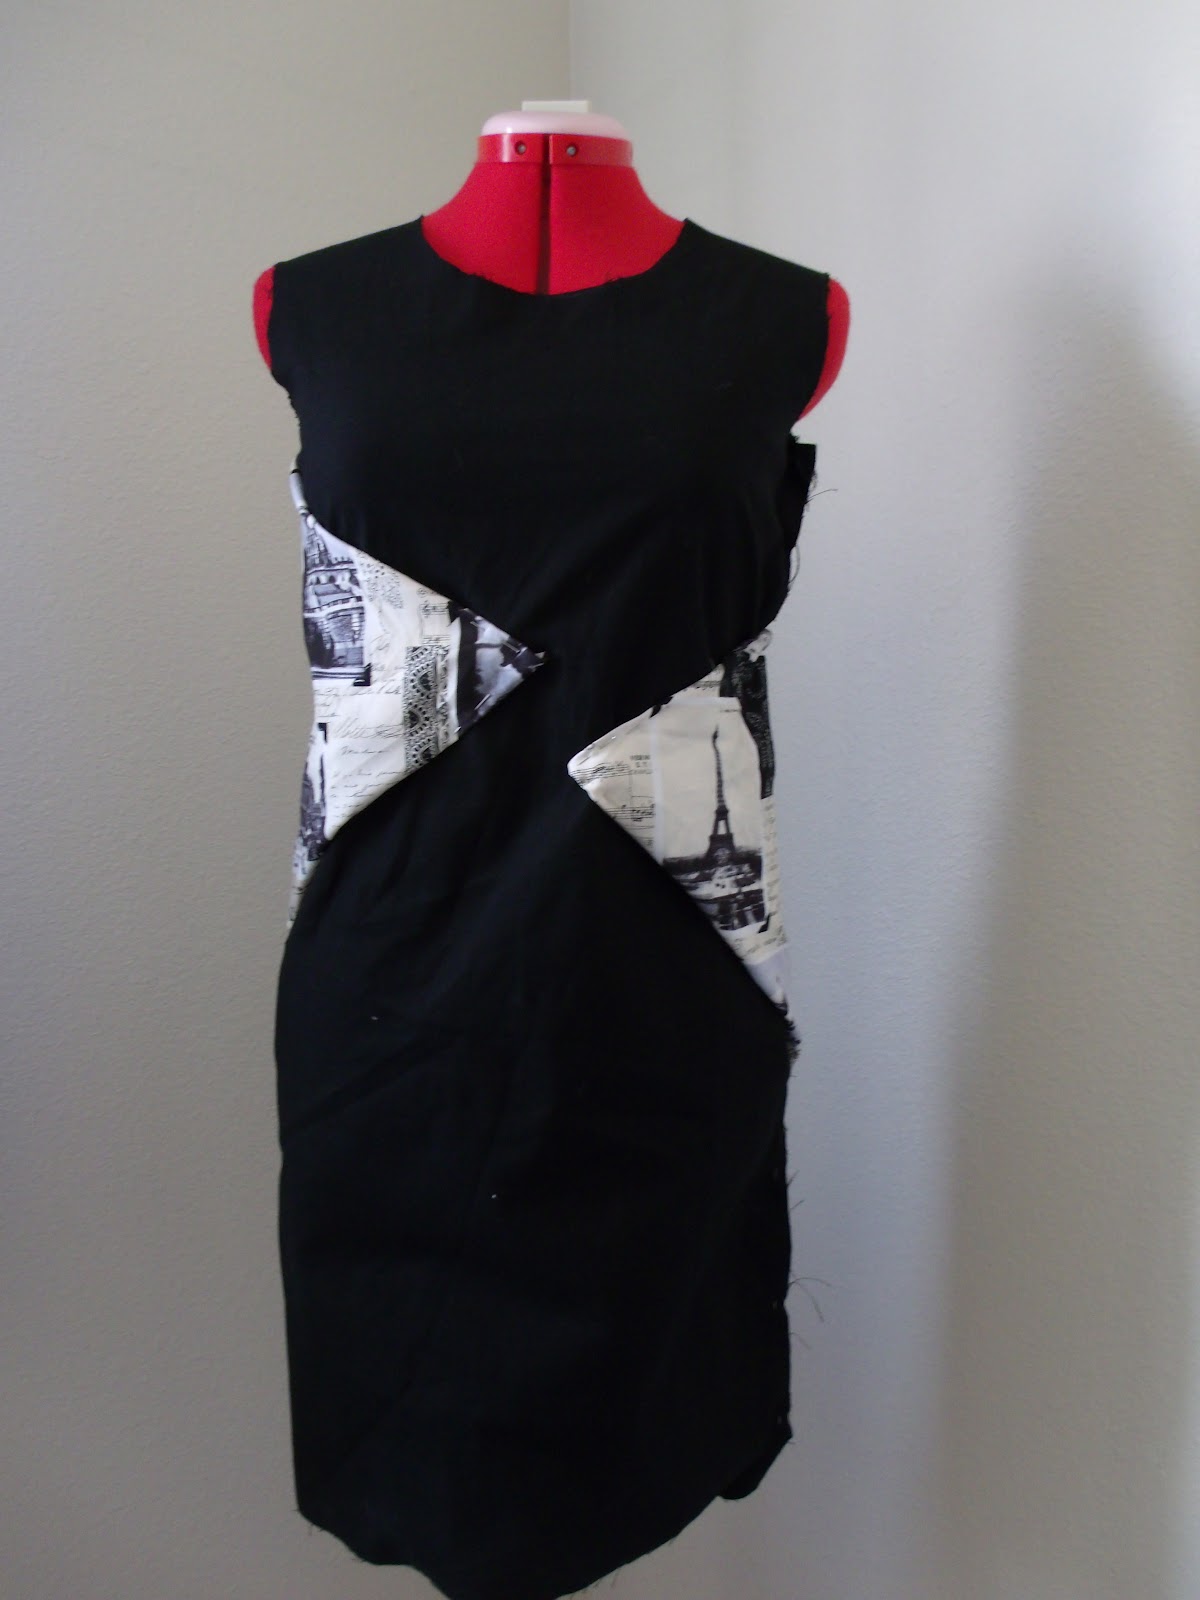
So after much deliberation and thanks to all your comments I finally decided on a design to go forward with! Woohoo! The design I have chosen is ..... drum roll please .......... design number 2!! I liked this one because it will be very flattering as the pattern focuses on the waist giving a nice shape and also hiding any lumps and bumps that all us ladies have!

In this post I will go through the next stages of the design process - finalizing the design and making the pattern. Here goes.

STEP 1: First I fiddled around with the two triangles to try and get the right shape and size. I marked the center if the waist on my shift dress so I knew where the point of the triangles had to hit.


This was my final design. At this point I used some colored chalk and marked around the triangles on the black shift dress so  could get a rough idea of where I wanted them.

STEP 2: I removed the dress from the dress form and unpinned the Paris material. Then I unpicked the side I previously basted closed to get something looking like this...


STEP 3: So I had a rough idea of where I wanted the cut out sections to be I just needed to tidy it up a bit. To do this I first measured on the side seam the top of the triangle from the arm holes on both sides and drew a horizontal line between these points. I did the same with the bottom of the triangle making sure both sides where equal and that the two lines were parallel. Then I marked the middle point of each line and drew and straight line through the points.


STEP 4: Now I have a central point to work around. I wanted the tips of the two triangles to be 1" apart at the center. I drew a line parallel to the horizontal line at the level of the center point and marked off 0.5" either side of the vertical line. Then I just connected the dots! Drawing a line from the top of the side seam mark to the tip of the triangle and then the bottom mark to the tip of the triangle.


STEP 5: At this point I needed to add some seam allowances before I cut out the pieces. I usually use 3/8" but you can use whatever you want. I marked 3'8" inside each triangle for my cutting line.


STEP 6: Rinse and repeat for the back! And your ready to cut.


Now for the pattern.

STEP 7: Basically you just need to follow the steps you used to get the cut out triangles on the material. Making the two horizontal lines and marking the center point. You can use the cut out sections to check you have done the pattern right. Remember they will be your seam allowance smaller on every side so don't panic that you have done it wrong!


And that's it!

Hope you found the tutorial useful. You can use this technique for any shape you want so get creative! Would love to hear your thought and comments are always welcome! 


Monday, July 9, 2012

Cut Out Shift Dress Ideas - Please Help Me Decide!!

As I said in my previous post I am very indecisive which I know isn't great for a designer! I should be able to make decisions right?! Well with this shift dress I have a major choice to make - Which design do I like best and want to develop? This is where I need your help.....

I have been furiously pinning the Paris fabric to the shift dress on my dress form in various shapes and sizes to see where I want the cut out sections to be. But turns out this has just made me even more confused! Here are the options....


DESIGN 1: This one is based off the t-shirt I made earlier with two diamond shapes which show round the front and the back. I could alter the position of the diamonds and the size.


DESIGN 2: This one is just a progression of design 1 with the diamonds meeting at the waistline symmetrically.


DESIGN 3: Single asymmetrical band across the waistline in two different widths.


DESIGN 4: Random patches of the material. Might end up changing the shape of them to rectangles of different sizes if I go with this one.


DESIGN 5: With this one I think I would make the section below the waist slightly narrower as it looks unbalanced as it i, but this is the general idea...


DESIGN 6: This is a follow on from the previous design. The top bit will hit the shoulder seam but I ran out of material so you'll have to use your imagination!


DESIGN 7: Asymmetric look again.


DESIGN 8: For this one I broke up the previous design into two different curves. I was getting tired by this point so its quite messy - sorry about that!


DESIGN 9: Final one! For this one I basically did the opposite to design 6.


Phew! That was a lot of designs! I would love any feedback or comments you have to help me decide on which on to go with. Which one is your favorite? 

Thursday, July 5, 2012

Cut Out Shift Dress Progress Report

I have finally made some headway with the cut out shift dress! So here it is.


First I started to make the shift dress. After a few trial and error attempts I ended up making a basic pattern for a dartless shift dress. My first thoughts were to make it quite loose fitting but trying this out I found that this would distort the pictures of the Paris printed fabric so I decided on a tighter fit. In the end this dress will be very slimming as the triangles will bring in the waist and give you a great curvy shape. That's the plan anyway!

Here a few pictures of the basic shift. The fabric I used is black twill with a 20% stretch. This will add some comfort to the dress - I like to use fabric with a bit of stretch for tighter fitting designs.

Front

Back

As you have probably noticed my dress form is slightly wonky so sorry about that! I don't really know how that happened! Still works. I have sewn up all the seams except from the left hand side which is where I intend to put an invisible zipper. 

Now for the hard bit - adding the cut out triangles in the right place. For this part I just started experimenting with placement and size to see what I like the look of. I haven't quite finished this part yet and just took a few snap shots of my first attempt. Still got some work to do...


The dress will eventually have two cut out sections just as soon as I decide on where they will go. I can be quite indecisive so this may take some time!!

Let me know what you all think of the first attempt and where you would put the second cut out piece. Are you as indecisive as me? Any help or comments are very welcome!

Sunday, June 17, 2012

1940's Dress Finished But Do I Like It?

Have you ever finished making something and try it on then realise you look awful in it?! Well that's what happened to me for the 1940's dress. I really wasn't happy with the neckline. My husband of course said it looked beautiful and thought I was panicking over nothing but you can't really trust your husband now can you?!

Here are a few pictures - sorry about the rubbishness of them I was in a rush to make it right! I did smile though :-) 

My blog writing laptop in the corner :-)


I actually liked the back.

So late that night only two days away from the ball I go about unpicking the front section of the dress. I did have a few topless moments of Hugh Jackman in some robot movie to ease the pain of undoing all my hard work ;-) 

The next morning I start to construct a new front for the dress. I used my dress form to the max and just pinned bits of fabric to it until I liked the look of it! I wanted to make it into a v-neck rather than the round neckline. I saw a few dresses which had this kind of shape so based the new design on those. I didn't have much time to take many photos, but here are a few of the work in progress.

The starting of the v neck shape. I added gathers under the bust and at the shoulder to add more interest

I added a straight piece of fabric for a makeshift shoulder pad look and gathered fabric onto that.

This is what I decided to go with so I just did the same on the other side and sewed it together!
 So after all that drama I was very happy with the results and was pleased I decided to change the neckline. Cinderella would be ready for the ball after all!! 

Have you ever done the same thing to one of your creations? What did you change? Did it work in the end? I would love to hear your stories so please feel free to comment. I will post some pictures of the actual 1940's ball very soon....


Related Posts Plugin for WordPress, Blogger...